Step by step guide to setting up a bbPress forum – part 2

Step by step guide to setting up a bbPress forum – part 2

Step by step guide to setting up a bbPress forum – part 2
Codex Home → Step by step guide to setting up a bbPress forum – part 2
WHERE ARE WE?
Part 1 dealt with getting the forum going.
Part 2 deals briefly with plugins, but mainly with changes to styling and bbPress.css
Part 3 will dealt with layout and functionality.
The forum is now fully functional, but probably you』ll want to change some of how it looks. If you』re using anything but a default theme, I expect that the colors won』t look right, and you may want to change some fonts.
You may also want to change where elements are displayed. Or add other functions to your site.
So there are two types of change we might want to make to our site –

changes in style – how it looks, and
changes in functionality – how it works.

Changing bbPress to achieve both these can consist of 4 things:
1. Changing CSS
2. Adding Plugins
3. Changing function files
4. Changing PHP files
This part 2 deals with changes in style which means primarily changing css.
Summary for techies
If you』re already into css, then bbpress uses by default a file called bbpress.css located in wp-content/plugins/bbpress/templates/default/css
Either just override styling in your theme』s css, or copy the bbpress.css file to a folder
/wp-content/themes/%your-theme%/css/
and bbpress will use that file, so make changes there.
A quick bbpress styling crib is available to get you started.
1. What is css?
CSS stands for Cascade Style Sheet – it』s a simple way to define elements of the site that will be used often. For instance if parts of your website have a heading, then defining a heading style once (font size, color, font used, bold, italic etc.), and then simply referring to it each time a heading is displayed is much easier than defining it each time.
Now we can override the default CSS elements in 4 ways

With a css plugin
Adding code to our child theme』s style.css
Copying/creating a bbpress stylesheet in your child theme
With functions (see below)

2. Using a CSS plugin
There are several around, including https://wordpress.org/plugins/simple-custom-css/ just google 『WordPress css plugin』 to find one right for you.
Using these you can add css to your site without needing to code in files, and if you』re only doing a few small changes, this can be an easy way without fearing that you』ll ruin a file on your website.
However if you doing all but a few small changes, you would be better looking at the remaining options
So in this section we』ll deal with b & c.
But before we do that, we need to understand a bit more about how to change files without losing our work later on.
3. Changing files Overview – get a child theme !
To make bbPress work or look better without plugins, we』ll need to change files.
Now if we simply change the files in bbPress, then any updates to bbPress will risk losing these changes, and undoing all your hard work.
So we will make changes in our WordPress themes, leaving alone the bbpress plugin directory.
If you』re in to writing your own WordPress themes, then I suspect you』ll be skim reading this article, so the next bit is for those of you that are either using a WordPress default (twentyten, twentyeleven etc.) or have chosen one of the many free or paid for themes.
If you have gone for any of the above, then again if you simply make changes to the theme, then any updates to your theme will risk losing these changes, and again undoing all your hard work.
If you are a bit more advanced, you may already have a child theme, and it is here that we』ll make additions and changes. That way updates will not affect lose the changes we have carefully crafted.
If you don』t currently have a WordPress child theme, then the best way to proceed is to create one, and then you can make changes there.
If you don』t know how to create one, the WordPress Child Theme training module is a great place to start, also search google 「child theme wordpress video」 and you』ll find lots of demonstrations. If someone has built a site for you, it may already be a in a child theme, and again the video』s will let you see whether this is the case.
So let』s presume you now have a child theme…
bbPress picks on the styles used in your theme for some elements, but uses its own CSS style sheet for others. This default css works well with the wordpress twentyten theme, but may not look right with your theme.
4. Adding code to our child theme』s style.css
If you』re making just a few changes, then adding the code to your child theme』s style.css is the easiest way to go
We』ll come later to the key bits of code you might want to change, but for the moment let』s suppose that you don』t like the way bbPress lists the forums.
The default looks like :

And you』d like it to look like :

This element is styled in the original bbPress.css file as followed
#bbpress-forums .bbp-forums-list li {
display: inline ;
font-size: 11px;
}
Changing the 『display:inline』 to 『display:list-item』 will achieve this. But as we said above, whilst you could simply amend line 121 (in wp-content/plugins/bbpress/templates/default/css/bbpress.css) you don』t want to alter this, as upgrades to bbPress versions might well overwrite this.
So we simply enter the appropriate code in our child theme』s style.css.
We can enter the entire 「chunk」 of code, and if you』re copying from bbpress.css, then copying the entire chunk and then altering just the bits you want will help you remember what other parameters are there
So
#bbpress-forums .bbp-forums-list li {
display: list-item !important;
font-size: 11px;
}
achieves this. Equally well you could post
#bbpress-forums .bbp-forums-list li {
display: list-item !important;
}
ie just the bits of the code that you actually want to change.
NOW you may have spotted that I』ve added 『!important』 to the line. This is because our theme style.css file will execute first, then the bbpress.css (being a plugin) will execute afterwards. Since the later bbpress.css file contains the original code, this will simply overwrite the changes you have made. By entering 『!important』 to the line, you tell WordPress not to allow this code to be overwritten by later code, so preserving your change.
So that』s method 1, using your child theme』s style.css.
5. Copying/creating a bbpress stylesheet in your child theme
The alternative method is to either take a copy of bbpress』 default css or create a brand new one, and put this in a specific area of your theme that bbpress looks for.
For .css files, bbpress looks at you theme files in the following location :
/wp-content/themes/%your-theme%/css/
where %your-theme% is the actual directory name of your theme.
So any .css file found in this location will be used. I am not sure if this is instead of the bbpress.css file in the plugin default location or in addition to it. You will need to check that yourself, as at the time of writing I have not!
So your best bet is to copy the bbpress.css from wp-content/plugins/bbpress/templates/default/css/bbpress.css
To a directory called css as above in your theme directory.
You can then edit this theme to your heart』s content, knowing that it won』t be overwritten by any bbpress upgrades.
So if you』re now ready to start changing code but what can you change?
See bbPress styling crib to get you started.
6. Changing colors
For people starting out with css, knowing what exact color something is  can be tricky. So if your main theme has a background of a light blue – how do you get that exact same shade in bbpress.
More technical people will use features within browsers to show them the underlying information. For instance many people use a product called 「firebug」 with a Firefox browser to show them exactly what is happening, including what exact colours are being used for text and backgrounds. These tools can be extremely useful as you progress, and it』s worth getting to know them if you plan more than a couple of changes. Google 「firebug video」 to get lots of help such as Firebug tutorial
An alternative if colors are what you』re after is to use a product like colorcop which will let you see exactly what color is being used on any part of your screen, so copying either your own theme』s colors or someone else』s is really easy.
The next section deals with changing layout and functionality part 3

bbp_reply_author_link

bbp_reply_author_link

bbp_reply_author_link
Codex Home → bbp_reply_author_link
Description
The 『bbp_reply_author_link』 function is used to display the current reply author』s user role, avatar and username linked to their profile
Where is it used
Templates: loop-single-reply.php loop-search-reply.php
How to use it
1
$args (optional) – Accepts an array of arguments to configure display ( post_id, link_title, type, size, sep, show_role )
Uses bbp_get_reply_author_link()
Sample code example
1
Displays the linked avatar and username for the current reply author
1 '
', 'show_role' => true ) ); ?>
Displays the current reply author and user role separated by an HTML
element
1 '
', 'show_role' => true, 'size' => 32 ) ); ?>
Displays the current reply author and user role separated by an HTML
element and sets their avatar to a size of 32px wide and 32px tall
1 '
', 'show_role' => false, 'type' => 'avatar' ) ); ?>
Displays only the current reply author user』s avatar without their display name or user role
1 '
', 'show_role' => false, 'type' => 'name' ) ); ?>
Displays only the current reply author user』s display name without their avatar or user role
Related
bbp_author_link()
bbp_topic_author_link()

Step by step guide to setting up a bbPress forum – part 3

Step by step guide to setting up a bbPress forum – part 3

Step by step guide to setting up a bbPress forum – part 3
Codex Home → Step by step guide to setting up a bbPress forum – part 3
Part 2 of the guide dealt with styling changes.
This part will deal with changing what appears and where it appears – changing some of the functionality of bbPress.
Now you can alter functionaility in many ways. These include
1. with plugins
2. with functions
3. by changing bbPress files
4. adding filters
5. adding hooks
1. Plugins
If you』re not familiar with coding, then plugins can offer a great way to add functionality without needing to do coding. There are lots around, if you』re after something it』s always worth trying a google search with 「bbpress plugin」 and whatever you are after.
Some I have used include :
bbP signature – lets users add a 『signature』 to their posts – used a lot in forums
bbP topic views – displays how many times a topic has been viewed
and ones that might well be useful, but I haven』t used :
bbpress-notify – notifies admins, moderators etc. (fully configurable to role) when new post and replies are made
The rest of this part will assume that you have a child theme, if you』re not familiar with what this is and why you need it, please visit part 2 of this guide where it is all explained.
So lets assume you have a child theme.
2. Functions
A short guide on how to create a child theme and functions file can be found here
Functions files and child themes explained
3. Changing bbPress files
This part of the guide is primarily going to deal with the bbPress templates that the default bbPress plugin uses to display your forum.
NOTE: This part deals with changing templates that belong to the bbPress Plugin, and these changed templates should then reside within a bbpress folder in your theme.  HOWEVER if you create a bbpress.php file from a theme template or php file (that is a file that sites in your theme such as page.php) , then this resides in your theme』s root.  So if the source is the plugin, then bbpress folder;  if the source is your theme, then your theme folder !
Changing these files gives you a powerful way to improve how your forum works for your users, and in some cases making it easier for you to administer.
In part 2 we explained how changing files in the bbPress plugin was not a good idea, and these files are frequently overwritten on an upgrade. So to change files, you』ll need to copy them you your child theme.
Bbpress will normally use the default files found at
wp-content/plugins/bbpress/templates/default/bbpress
However if you create a directory in your child theme at
/wp-content/themes/%your-theme%/bbpress/
(where %your-theme% is your child theme』s name)
then any files stored there will be used instead.
This means that if you want to alter how a topic displays, then copying the relevant file (in this case loop-single-reply) to this folder will mean that bbPress uses this file instead, so you can now alter it to work how you want.
There are two sources that you might want to use for files – one is at
wp-content/plugins/bbpress/templates/default/bbpress
For instance in this bbPress folder you』ll find
loop-single-reply – this file displays a topic and all its replies letting you change the heading and the format within a post – for instance removing the avatar or adding extra words below it.
If you want to alter lower level files, then the other source is
wp-content/plugins/bbpress/templates/default/extras
Here you can alter for instance whether a single topic has a footer.
To alter any of these lower level files they need to be copied to the root of your child theme that is to
/wp-content/themes/%your-theme%/
(where %your-theme% is yout themes name).
So bbPress offers a simple way to change the layout and information displayed.
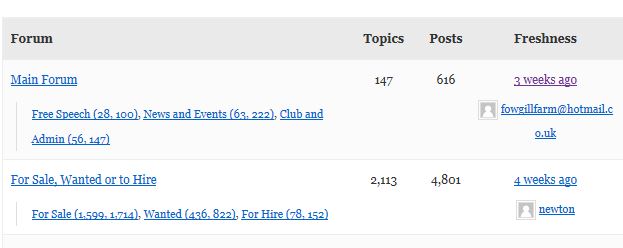
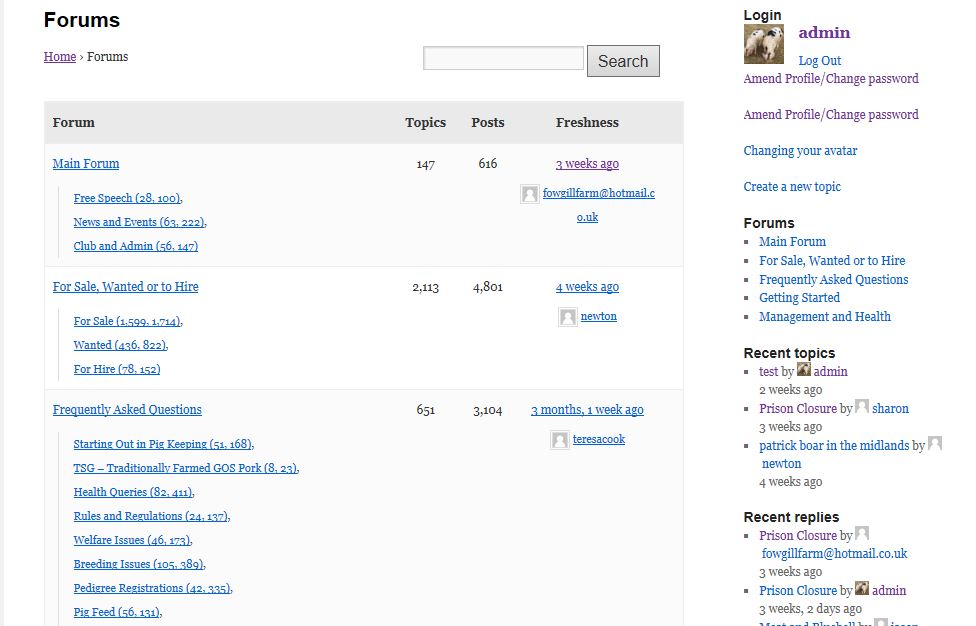
As an example, the default forum display looks like

which displays the forum counts for the sub-topics.
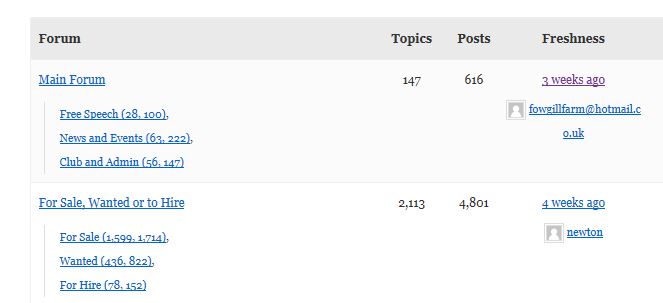
If you wanted to take these out to look like

Then you would need to change
loop-single-forum.php by changing how the code displays
so you would change line 44  from


to read
 
false,
『show_reply_count』    => false,
『separator』 => 」,
));  ?>
 
So copy the file loop-single-forum.php from wp-content/plugins/bbpress/templates/default/bbpress to /wp-content/themes/%your-theme%/bbpress/
and add the above function. Then save, and hey presto, the counts have gone !
For some starters on what you might want to change have a look at Layout and Functionality – Examples you can use
Part 4 deals with adding actions and
Part 5 deals with adding filters

bbp_topic_author_link

bbp_topic_author_link

bbp_topic_author_link
Codex Home → bbp_topic_author_link
Description
The 『bbp_topic_author_link』 function is used to display the current topic author』s user role, avatar and username linked to their profile
Where is it used
Templates: content-single-topic-lead.php
How to use it

$args (optional) – Accepts an array of arguments to configure display ( post_id, link_title, type, size, sep, show_role )
Uses bbp_get_topic_author_link()
Sample code example

Displays the linked avatar and username for the current topic author
'
', 'show_role' => true ) ); ?>
Displays the current topic author and user role separated by an HTML
element
'
', 'show_role' => true, 'size' => 32 ) ); ?>
Displays the current topic author and user role separated by an HTML
element and sets their avatar to a size of 32px wide and 32px tall
'
', 'show_role' => false, 'type' => 'avatar' ) ); ?>
Displays only the current topic author user』s avatar without their display name or user role
'
', 'show_role' => false, 'type' => 'name' ) ); ?>
Displays only the current topic author user』s display name without their avatar or user role
Related
bbp_author_link()
bbp_reply_author_link()
bbp_show_lead_topic()

bbPress 樣式參考

bbPress 樣式參考

本指南將向您展示新 bbPress 論壇的區域,您可以使用 CSS 以及 bbPress 外掛中使用的類和選擇器來設定每個區域的樣式。

設計您的論壇

這些可以新增到您的 css 中,或新增到 bbpress.css 的自定義版本中 – 請參閱設定 bbpress 論壇的分步指南第 2 部分瞭解更多資訊。

論壇嬰兒床

論壇

bbPress 論壇中的所有內容

這是用於 bbPress 論壇所有部分的 CSS 。根據您的需要增加字型大小。

#bbpress-forums { background: transparent; clear: both; margin-bottom: 20px; overflow: hidden; font-size: 12px; }

1. 論壇頁首和頁尾

這是顯示作者、帖子和聲音等標籤的內容。

#bbpress-forums li.bbp-header, #bbpress-forums li.bbp-footer {  background: #f3f3f3;  border-top: 1px solid #eee;  font-weight: bold;  padding: 8px;  text-align: center; }   #bbpress-forums li.bbp-header {  background: #eaeaea; }

2. 回覆標題

#bbpress-forums div.bbp-reply-header {     background-color: #f4f4f4; }

3. 模板通知資訊

div.bbp-template-notice.info {     border: #cee1ef 1px solid;     background-color: #f0f8ff; }

4. 話題/回覆背景

賠率,即使如此回覆也有交替的顏色

#bbpress-forums div.even, #bbpress-forums ul.even {  background-color: #fff; }   #bbpress-forums div.odd, #bbpress-forums ul.odd {  background-color: #fbfbfb; }

如果話題很粘或超級粘,那麼

.bbp-topics-front ul.super-sticky, .bbp-topics ul.super-sticky, .bbp-topics ul.sticky, .bbp-forum-content ul.sticky {  background-color: #ffffe0 !important;  font-size: 1.1em; }

自定義關閉話題文字的顏色。

#bbpress-forums .status-closed, #bbpress-forums .status-closed a {  color: #ccc; }

每個執行緒的執行緒回覆邊距。

#bbpress-forums ul.bbp-threaded-replies {  margin-left: 50px; }

5. 各種文字

這些通常繼承自您的主題。

但是,您可以使用修改內容

#bbpress-forums .bbp-topic-content, #bbpress-forums .bbp-reply-content {     font-size: 12px; }

上面的程式碼不在 bbpress.css 中,因此如果需要,請新增它,或放入您的 .css 中,請參閱頂部提到的指南以獲取更多資訊

6. 管理連結

span.bbp-admin-links {  float: right;  color: #ddd; }   span.bbp-admin-links a {  color: #bbb;  font-weight: normal;  font-size: 10px;  text-transform: uppercase;  text-decoration: none; }

7. 模板通知

div.bbp-template-notice, div.indicator-hint {  border-width: 1px;  border-style: solid;  padding: 0 0.6em;  margin: 5px 0 15px;  border-radius: 3px;  background-color: #ffffe0;  border-color: #e6db55;  color: #000;  clear: both; } div.bbp-template-notice a {  color: #555;  text-decoration: none; }  div.bbp-template-notice a:hover {  color: #000;  }  div.bbp-template-notice.info {  border: #cee1ef 1px solid;  background-color: #f0f8ff;  }  div.bbp-template-notice.important {  border: #e6db55 1px solid;  background-color: #fffbcc;  }  div.bbp-template-notice.error,  div.bbp-template-notice.warning {  background-color: #ffebe8;  border-color: #c00;  }  div.bbp-template-notice.error a,  div.bbp-template-notice.warning a {  color: #c00;  }  div.bbp-template-notice p {  margin: 0.5em 0 6px 0 !important;  padding: 2px;  font-size: 12px;  line-height: 140%;  }

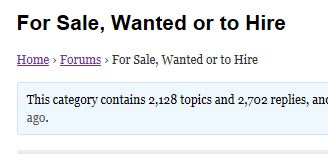
8. 從您的主題繼承的麵包屑和連結顏色

9. 其他造型功能

9.1 提交按鈕

正在尋找一種方法來更改 bbpress 、更大、顏色中的提交按鈕......?

#bbpress-forums .submit {     background-color: #a0668d;     color: #FFFFFF;     float: center;     vertical-align: middle;     border-radius: 10px;     height: 35px;     width: 80px;     font-size: 18px; }

並更改為您想要的!

10. 從最近的話題小工具和新鮮度中刪除頭像

widget_display_topics .bbp-author-avatar {     display: none ! important; }   .bbp-topic-freshness-author  .bbp-author-avatar {     display: none ! important; }

Feature Plugins Tracking

Feature Plugins Tracking

Feature Plugins Tracking
Codex Home → Feature Plugins Tracking
Here are some bbPress plugins that we think are could enhance your forums and that we may consider adding to the core of the bbPress plugin.
You should also search through our plugin section here. If what you are looking for is not listed in the featured plugins below please note that since the latest version of bbPress is now a plugin of WordPress , that if a WordPress plugin does not mention bbPress or tag bbPress that doesn』t mean it』s not compatible with bbPress. For example any anti-spam plugin like Akismet , or any social registration/simple registration plugin in the WordPress repository should work fine with bbPress.
_______________
Legend:
(U) – Link to trac ticket where this or similar functionality is being under consideration/discussed
(X) – might not work/ might need to be forked
(C) – Link to trac ticket where it is planned for Core
_______________

bbPress – Numeric ID Permalinks
bbPress – Topic Lock
bbPress – Topic Count (C)
bbPress – Last Post (U)
bbPress – Canned Replies
bbPress – Notices
bbPress – Private Replies
Voter Plugin
WP ULike
bbPress – Ajax Replies and bbPress – Ajax Topics
bbPress – Additional Shortcodes
bbPress – Attachments (U)
bbPress – Tools (U)
bbPress – Quotes or bbPress – Direct Quotes (U)
bbPress – Avatar or Basic User Avatars
bbPress – Forum Redirect
bbPress – Report Abuse or bbPress – Report Content
bbPress – Ignore User
bbPress – Polls
bbPress – Messages
bbPress – HashBuddy
bbPress – Live Preview (U)
bbPress – Spam Cleaner (U)
Razz BBPress Suspension (U)
bbPress – Topics for Posts (C)
bbPress – user online status (U)
bbPress – Topic Subscribers

bbPress – Support Forums (U)

Buddy-bbPress Support Topic
EDD bbPress Support Dashboard
bbResolutions (GitHub)
bbPress – VIP Support (X) (GitHub fork with updates here, and here)
bbPress – Simple Support

bbPress – Unread / Mark as Read plugins (U)

bbPress – Pencil Unread
bbPress Go To First Unread Post
bbPress – Mark as Read
bbPress Unread Posts (forked version 2 of plugin here )
bbPress New Topics
djb bbPress last read plugin (X)

_______________
This is just plugins to highlight for bbPress plugin/theme developers that have specific features for the development of bbPress.
bbPress – Development

bbPress – Slack Integration
bbPress – Monster Widget
Buddy-bbPress Visual Hooks
Query Monitor with Query Monitor bbPress & BuddyPress Conditionals
Debug Bar with Debug Bar bbPress

佈局和功能 - 您可以使用的示例

佈局和功能 - 您可以使用的示例

您可以使用 WordPress 和 bbPress 提供的鉤子和過濾器以多種方式自定義和擴充套件 WordPress 和 bbPress,還可以將一些 CSS 應用到您的論壇或主題。

下面是一些常用的自定義 PHP 和 CSS 程式碼片段列表,這些程式碼片段可能對社羣使用者自定義他們現有的 bbPress 論壇有用。

如果您發現列出的示例似乎不起作用,您想建議另一個有用的示例,或者使用不同/更好的方法來編輯當前的最終功能,然後請進入支援論壇並在論壇請求和反饋

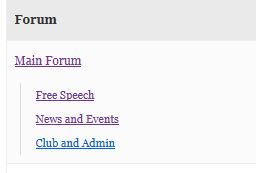
1. 更改論壇列表的顯示方式

預設看起來像: 論壇2

改成 : 論壇3

預設情況下,此元素使用 CSS 設定樣式。

#bbpress-forums .bbp-forums-list li { display: inline; }

將此 CSS 程式碼片段貼上到您的子主題的 style.css 並更改 display:inline 為 display:block 將實現此佈局。

您也可以改用 PHP 程式碼片段,並將以下函式放入您的子主題 functions.php 檔案中。

//create vertical list subforum layout function custom_bbp_sub_forum_list() {   $args['separator'] = ' ';   return $args; }  add_filter('bbp_after_list_forums_parse_args', 'custom_bbp_sub_forum_list' );

2. 從論壇列表中刪除話題/回覆計數

預設 :

論壇c
更改為:
論壇b
您可以更改 loop.single.forum.php,如 https://codex.bbpress.org/step-by-step-guide-to-setting-up-a-bbpress-forum-part-3/ 所示或者

將以下內容放入您的子主題 functions.php 檔案中。

function remove_counts() {     $args['show_topic_count'] = false;     $args['show_reply_count'] = false;     $args['count_sep'] = ''; return $args; } add_filter('bbp_before_list_forums_parse_args', 'remove_counts' );

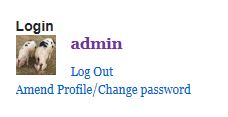
3. 向登入小工具新增 「修改個人資料/密碼」

雖然您可以單擊 bbPress 登入小工具中顯示的頭像或您的使用者名稱轉到您的個人資料,然後從那裡單擊編輯連結來編輯您的個人資料,但這對您的某些使用者來說可能並不那麼明顯。

安裝這個外掛 RKK Login Widget,它幾乎與預設的 bbPress Login Widget 完全相同。只需將 (RKK) 登入小工具放置到側邊欄之一,您的登入小工具就會與此類似。

論壇

根據需要自定義或編輯外掛。

4. 關閉或更改麵包屑

要刪除論壇中的麵包屑,請確保將此功能新增到子主題或功能外掛中的 functions.php 檔案中。

add_filter( 'bbp_no_breadcrumb', '__return_true' );

要自定義您要顯示的特定麵包屑連結的佈局,請將其新增到您的子主題 function.php 檔案中。

function mycustom_breadcrumb_options() {     // Home - default = true     $args['include_home']    = false;     // Forum root - default = true     $args['include_root']    = false;     // Current - default = true     $args['include_current'] = true;       return $args; } add_filter('bbp_before_get_breadcrumb_parse_args', 'mycustom_breadcrumb_options');

5. 移除論壇搜尋功能

如果您想刪除搜尋欄 (有些人喜歡要麼排除它,要麼把它放在側邊欄中)

預設情況下,搜尋表單將顯示如下。
論壇

這是之後的結果。
論壇

然後只需更改儀表盤> 設定> 論壇功能中的設定並取消勾選
Allow forumwide search 。

6. bbpress 後載入樣式表

介紹:當 WordPress 載入樣式表時,它們會先載入所有 theme.css 檔案,然後再載入外掛 css 。這樣外掛 css 的優先順序高於您的 css,唯一可以覆蓋它的方法是使用 !important 。眾所周知,這是一種不好的做法。

此外,您可以在您的主題中建立自己的 bbpress.css ,但這意味著需要處理更多檔案 (儘管這是最乾淨的解決方案) 。這是執行此操作的另一種方法:

將此程式碼貼上到您的子主題 functions.php 檔案中。

/** * load custom bbpress css after bbp default css */ wp_enqueue_style( 'custom-bbpress', get_stylesheet_directory_uri() . '/css/custom-bbpress.css',array('bbp-default'),'1.1','all');

7. 如何從模板中刪除所有面包屑並將它們設定在頁面頂部?

由 Markic 提交併感謝

簡介:我們中的許多人正在使用標題中的現有面包屑系統建立自己的主題。但是 bbPress 有自己的想法在哪裡顯示麵包屑,有時在頁面頂部,有時在搜尋表單下方,有時在標題下方。這是您可以快速更改的方法。

1. 如果還沒有,請在主題的根資料夾中建立 「bbpress.php」 。
2. 新增

<div class="truebreadcrumbs"><?php bbp_breadcrumb(); ?></div>

3. 新增此 CSS:

div.bbp-breadcrumb {  display: none; /*this will hide all breadcrumbs*/  }   .truebreadcrumbs div.bbp-breadcrumb {  display: block; /*this will display breadcrumbs you've created*/  }

當然,HTML 仍然會生成所有的麵包屑,而 css 會隱藏不需要的麵包屑,但這是最簡單的方法,無需進入模板。

8. 將 「編輯個人資料」 新增到 wordpress 選單

大多數 bbPress 使用者都有側邊欄,並使用小工具來控制登入和個人資料更改。其他人則依賴於使用者知道如果點選他們的頭像或使用者名稱,那麼他們就可以編輯他們的個人資料。

此解決方案允許您將 「編輯個人資料」 新增到您的 wordpress 選單中——這僅在使用者登入時顯示為選單項。

將以下內容新增到您的函式檔案中

// Filter wp_nav_menu() to add profile link add_filter( 'wp_nav_menu_items', 'my_nav_menu_profile_link' ); function my_nav_menu_profile_link($menu) {     if (!is_user_logged_in())         return $menu;     else         $current_user = wp_get_current_user();         $user=$current_user->user_nicename ;         $profilelink = '<li><a href="/forums/users/' . $user . '/edit">Edit Profile</a></li>';         $menu = $menu . $profilelink;         return $menu;   }

9. 將社交媒體聯絡人新增到 bbPress 個人資料

感謝 nicmare 提供這個方便的提示。

您可以透過將這些新增到 contactmethods 來新增和刪除社交媒體聯絡人。

以下示例函式新增了 twitter 、 facebook 、 google+ 和 youtube,但刪除了
目標、 yabber 和 yim 。

function add_extra_contactmethod( $contactmethods ) { // Add new ones $contactmethods['twitter'] = 'Twitter'; $contactmethods['facebook'] = 'Facebook'; $contactmethods['googleplus'] = 'Google Plus'; $contactmethods['youtube'] = 'Youtube';   // remove unwanted unset($contactmethods['aim']); unset($contactmethods['jabber']); unset($contactmethods['yim']);   return $contactmethods; } add_filter('user_contactmethods', 'add_extra_contactmethod');

10. 縮短新鮮度的措辭

此程式碼縮短新鮮度取出分鐘

只需將其放入您的函式檔案中

//function to shorten freshness display from say '1 month, 2 weeks' to '1 month' function short_freshness_time( $output) { $output = preg_replace( '/, .*[^ago]/', ' ', $output ); return $output; } add_filter( 'bbp_get_time_since', 'short_freshness_time' ); add_filter('bp_core_time_since', 'short_freshness_time');

11. 簡單地在選單中新增登入/登出

為使用者新增用於登入/登出、註冊或恢復其密碼的選單項到您的站點選單非常有用,尤其是在您決定不使用 bbPress 側邊欄登入小工具的情況下。

將以下 php 程式碼片段貼上到您的子主題的 functions.php 檔案中。

add_filter( 'wp_nav_menu_items', 'rkk_add_auth_links', 10 , 2 ); function rkk_add_auth_links( $items, $args ) {  if ( is_user_logged_in() ) {  $items .= '<li><a href="'. wp_logout_url() .'">Log Out</a></li>';  }  elseif ( !is_user_logged_in() ) {  $items .= '<li><a href="'. site_url('wp-login.php') .'">Log In</a></li>';  $items .= '<li><a href="'. site_url('wp-login.php?action=register') .'">Register</a></li>';  $items .= '<li><a href="'. site_url('wp-login.php?action=lostpassword') .'">Lost Password</a></li>';  }  return $items; }

您可以根據自己的喜好自定義此功能。如果您想將某些 url 連結到自定義前端表單而不是預設的 WordPress 登入表單,您可以進行這樣的簡單更改,例如。

site_url('wp-login.php') 對此 site_url('/login/')

如果您想在登出後重定向到自定義 url 。

wp_logout_url() 把這個改成這個 wp_logout_url( site_url('/logout/') )

或者,如果您想在特定選單中顯示這些選單項,請在 之後的函式中編輯兩個條件 is_user_logged_in() 。

像這樣新增到現有的條件中,is_user_logged_in() && $args->theme_location == 'primary-menu'.

上面的程式碼將在您的功能條件中顯示特定選單中的選單項,其中主題位置通常是選單段。要查詢此功能的選單的 slug/主題位置搜尋,通常位於主題 functions.php 檔案中 register_nav_menu() 。有關了解 register_nav_menu() 函式的更多資訊,請參閱 WordPress 指南導航選單

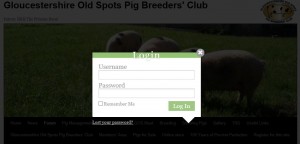
12. 新增模態 (彈出) 登入

這非常好,說明將其新增到選單中,並根據需要使用登入/登出。

登入看起來像這樣

模態登入3

有不同的風格可供選擇,您可以設計自己的風格。

說明可以在這裡找到

13. 防止關閉的話題變灰

預設情況下,關閉回覆的話題是 「灰色的」 。但通常您只是想停止發帖,最常見的是針對論壇頂部的熱門話題。

將此程式碼新增到主題中的 css 或修改主題 css 資料夾中的 bbpress.css 。

#bbpress-forums .status-closed, #bbpress-forums .status-closed a {   color: #aaa !important; }

14. 新增新的 bbpress 角色

您可以新增新的 bbpress 角色,甚至更改其功能。

在最簡單的級別上,您可以新增新角色名稱併為其賦予現有能力

這僅對您自己的管理目的很有用,但如果像我一樣討厭 「keymaster」 角色名稱,只需建立一個新角色併為其賦予 keymaster 功能。

以下程式碼建立了三個名為 「name 1」 、 「name 2」 和 「name 3」 的新角色,第一個角色有參與者、第二個主持人和第三個關鍵管理員。

只需修改程式碼即可建立具有您需要的任何功能的任意數量的角色

function add_custom_role( $bbp_roles ) {   $bbp_roles['my_custom_role1'] = array( 'name' => 'name 1', 'capabilities' => bbp_get_caps_for_role( bbp_get_participant_role() ) // the same capabilities as participants ); $bbp_roles['my_custom_role2'] = array( 'name' => 'name 2', 'capabilities' => bbp_get_caps_for_role( bbp_get_participant_role() ) // the same capabilities as participants ); $bbp_roles['my_custom_role3'] = array( 'name' => 'name 3', 'capabilities' => bbp_get_caps_for_role( bbp_get_keymaster_role() ) // the same capabilities as keymaster ); return $bbp_roles; } add_filter( 'bbp_get_dynamic_roles', 'add_custom_role', 1 );

15. 在 bbpress 角色中新增自定義功能

新增自定義功能

16. 論壇頁面新增說明

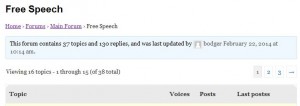
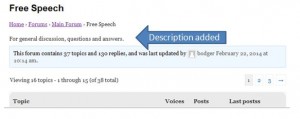
如果您建立一個帶有描述的論壇,這隻會顯示在主索引頁面上,而不顯示在類別頁面或論壇頁面上

從:

說明1

到 :

說明2

將以下內容新增到您的函式檔案中。

//filter to add description after forums titles on forum index function rw_singleforum_description() {   echo '<div class="bbp-forum-content">';   echo bbp_forum_content();   echo '</div>'; } add_action( 'bbp_template_before_single_forum' , 'rw_singleforum_description');

我還新增了這個自定義 CSS 。將此新增到您的子主題的 style.css 檔案中,以將其放置在麵包屑下。

#bbpress-forums div.bbp-forum-content {   clear: both !important;   margin-left: 0 !important;   padding: 0  !important; }

17. 將訂閱移至右側

改變
訂閱1

到:

訂閱2

將以下內容放入您的 style.css

/*styling to move 'Subscribe' to right hand side */ .single-forum .subscription-toggle  {     float:right !important ; }

如果您只想將其稍微向右移動,則可以使用此自定義 CSS 。根據您的喜好調整 5px 。

/*styling to move 'Subscribe' to right hand side */ .single-forum .subscription-toggle  {     padding-left: 5px !important ; }

18. 防止使用者更改他們的顯示名稱

使用者可以在 bbpress 個人資料頁面中更改他們的顯示名稱。一些論壇希望阻止這種情況以阻止使用者隱藏他們的身份。

要關閉此功能,您需要編輯預設檔案之一併將其儲存到您的主題中。

在您的主題中建立一個 bbpress 資料夾。

wp-content/themes/%yourtheme%/bbpress

其中 %yourtheme% 是您的主題名稱

然後導航到

wp-content/plugins/bbpress/templates/default/bbpress/form-user-edit.php

並將此檔案複製到您在上面建立的 bbpress 資料夾中

bbpress 現在將使用這個而不是預設值。

編輯這個新檔案並取出第 33 到 45 行

即取出以下內容

<div>             <label for="nickname"><?php _e( 'Nickname', 'bbpress' ); ?></label>             <input type="text" name="nickname" id="nickname" value="<?php bbp_displayed_user_field( 'nickname', 'edit' ); ?>" class="regular-text" tabindex="<?php bbp_tab_index(); ?>" />         </div>         <div>             <label for="display_name"><?php _e( 'Display Name', 'bbpress' ) ?></label>             <?php bbp_edit_user_display_name(); ?>         </div>         <?php do_action( 'bbp_user_edit_after_name' ); ?>

這將刪除設定暱稱和更改顯示名稱的功能。

19. 連結到一個隨機的單個話題

這是一個非常漂亮的功能,允許使用者透過單擊連結瀏覽隨機話題。

如果您啟用了它,它會掛在主要主題之前,否則它還會建立一個名為 [ntwb-bbpress-random-single-topic] 的簡碼,允許您將其放入小工具或 WordPress 帖子中。

// bbPress - Random Single Topic function ntwb_bbpress_random_single_topic() {     if ( bbp_has_topics( array( 'orderby' => 'rand', 'posts_per_page' => 1 ) ) ) {           while ( bbp_topics() ) : bbp_the_topic();               ?>             <a class="bbp-topic-permalink" href="<?php bbp_topic_permalink(); ?>">Random Topic</a>             <?php           endwhile;     } } // Hook into action add_action('bbp_template_before_lead_topic','ntwb_bbpress_random_single_topic'); // Add it as a shortcode [ntwb-bbpress-random-single-topic] add_shortcode('ntwb-bbpress-random-single-topic', 'ntwb_bbpress_random_single_topic');

20. 重新命名使用者角色名稱

此功能允許您重新命名 bbPress 預定義的使用者角色。

只需將 「我的自定義 *** 角色名稱」 更改為您喜歡的內容即可。

add_filter( 'bbp_get_dynamic_roles', 'ntwb_bbpress_custom_role_names' );   function ntwb_bbpress_custom_role_names() {     return array(           // Keymaster         bbp_get_keymaster_role() => array(             'name'         => 'My Custom Keymaster Role Name',             'capabilities' => bbp_get_caps_for_role( bbp_get_keymaster_role() )         ),           // Moderator         bbp_get_moderator_role() => array(             'name'         => 'My Custom Moderator Role Name',             'capabilities' => bbp_get_caps_for_role( bbp_get_moderator_role() )         ),           // Participant         bbp_get_participant_role() => array(             'name'         => 'My Custom Participant Role Name',             'capabilities' => bbp_get_caps_for_role( bbp_get_participant_role() )         ),           // Spectator         bbp_get_spectator_role() => array(             'name'         => 'My Custom Spectator Role Name',             'capabilities' => bbp_get_caps_for_role( bbp_get_spectator_role() )         ),           // Blocked         bbp_get_blocked_role() => array(             'name'         => 'My Custom Blocked Role Name',             'capabilities' => bbp_get_caps_for_role( bbp_get_blocked_role() )         )     ); }

21. 在論壇索引後顯示 5 個最近的話題

此功能在您的論壇索引後顯示最新的 5 個話題。

// Add Recent Topics to BBPress function recent_bbpress_topics() { { ?>  <?php  if ( bbp_has_topics( array( 'author' => 0, 'show_stickies' => false, 'order' => 'DESC', 'post_parent' => 'any', 'posts_per_page' => 5 ) ) )  bbp_get_template_part( 'bbpress/loop', 'topics' );  ?> <?php }} // Hook into action add_action('bbp_template_after_forums_index','recent_bbpress_topics');

22. 僅顯示 1 個修訂日誌話題和回覆

使用此功能清理您的修訂日誌。

// Only return one entry for revision log otherwise it gets cluttered function bbp_trim_revision_log( $r='' ) {  $arr = array( end( $r ));  reset( $r );    return( $arr ); }   add_filter( 'bbp_get_reply_revisions', 'bbp_trim_revision_log', 20, 1 ); add_filter( 'bbp_get_topic_revisions', 'bbp_trim_revision_log', 20, 1 );

23. 顯示 bbPress 論壇搜尋無處不在

在單個論壇和單個話題上方顯示論壇搜尋,但不在 bbPress 個人資料上。

//display bbPress search form above sinle topics and forums function rk_bbp_search_form(){       if ( bbp_allow_search()) {         ?>         <div class="bbp-search-form">               <?php bbp_get_template_part( 'form', 'search' ); ?>           </div>         <?php     } }   add_action( 'bbp_template_before_single_forum', 'rk_bbp_search_form' ); add_action( 'bbp_template_before_single_topic', 'rk_bbp_search_form' );

24. 顯示 bbPress 主題的狀態標籤

這些功能中的每一個都將幫助您根據當前主題的狀態新增特定的標籤或圖示。

在每個話題旁邊顯示粘性標籤。

function rk_sticky_topics() {      if ( bbp_is_topic_sticky() && !bbp_is_topic_closed() )       echo '<span class="sticky">[Sticky]</span>'; }   add_action( 'bbp_theme_before_topic_title', 'rk_sticky_topics' );

在每個話題旁邊顯示封閉標籤。

function rk_closed_topics() {      if ( bbp_is_topic_closed() && !bbp_is_topic_sticky() )       echo '<span class="closed">[Closed]</span>'; }   add_action( 'bbp_theme_before_topic_title', 'rk_closed_topics' );

如果該話題的回覆超過 25 條,則顯示熱標籤。
(您可以將 25 更改為任何您想要的)

function rk_hot_topics() {    $reply_count = bbp_get_topic_reply_count();      if ( $reply_count > 25 )       echo '<span class="hot">[Hot]</span>'; }   add_action( 'bbp_theme_before_topic_title', 'rk_hot_topics' );

如果某個話題已關閉且有粘性,則顯示 「公告」 標籤。

function rk_announcement_topics() {      if ( bbp_is_topic_sticky() && bbp_is_topic_closed() )       echo '<span class="announcement">[Announcement]</span>'; }   add_action( 'bbp_theme_before_topic_title', 'rk_announcement_topics' );

建立話題後一小時內顯示 「新」 標籤。
將偏移量更改為您想要的任何值,但請確保數量以秒為單位。
例如 60*60*1 = 3600 seconds ,這是 1 小時的秒數。

function rk_new_topics() { $offset = 60*60*1;      if ( get_post_time() > date('U') - $offset )       echo '<span class="new">[New]</span>'; }   add_action( 'bbp_theme_before_topic_title', 'rk_new_topics' );

您可以透過在圖示字型 HTML 中新增以顯示圖示來輸入圖示。

無論您在哪裡看到這個

echo '<span class="example">[Example]</span>';

您可以輕鬆地將其更改為此。
在這裡,我使用了 Dashicons 圖示字型集中的隨機字型。

echo '<span class="example"><span class="dashicons dashicons-admin-post"></span>[Example]</span>';

如果您要使用基本的 HTML 插入圖示的方式,您可以使用這個小 CSS 片段來設定它們的樣式。

#bbpress-forums li.bbp-topic-title span.dashicons {   float: left;   margin-right: 5px; }

您也可以僅使用 CSS 在話題標題之前或之後插入自定義圖示字型。

這是來自該站點的 Dashicons 示例。

此 CSS 程式碼在置頂帖之前的話題圖示之前顯示置頂圖示。

ul.sticky 和 ​​ul.super-sticky 都是該話題的帖子類,您可以利用和自定義更多帖子類。

#bbpress-forums ul.sticky li.bbp-topic-title a.bbp-topic-permalink:before, #bbpress-forums ul.super-sticky li.bbp-topic-title a.bbp-topic-permalink:before {   font: normal 16px/1 'dashicons';   content: '\f450';   margin-right: 5px;   float: left;   padding-top: 3px;   color: #bb0; }

25. 限制使用者訪問 WordPress 後端

新增此 PHP 程式碼片段以僅允許只能編輯帖子的使用者訪問 WordPress 後端。

/**  * Redirect back to homepage and not allow access to  * WP backend for Subscribers.  */ function rkk_redirect_admin(){     if ( ! current_user_can( 'edit_posts' ) ){         wp_redirect( site_url() );         exit;     } } add_action( 'admin_init', 'rkk_redirect_admin' );

您可能還想為參與者禁用 WordPress 工具欄。

/**  * Disable toolbar on the frontend of your website  * for subscribers.  */ function rkk_disable_admin_bar() {     if( ! current_user_can('edit_posts') )         add_filter('show_admin_bar', '__return_false'); } add_action( 'after_setup_theme', 'rkk_disable_admin_bar' );

您也可以安裝 WP Admin No Show 來執行此類操作。

26. 建立一個 bbPress 特定的側邊欄

沒有外掛

註冊您的新側邊欄

將此新增到您的子主題 functions.php 檔案中

function rkk_widgets_init() {       register_sidebar( array(         'name' => __( 'bbPress Sidebar', 'rkk' ),         'id' => 'bbp-sidebar',         'description' => __( 'A sidebar that only appears on bbPress pages', 'rkk' ),         'before_widget' => '<aside id="%1$s" class="widget %2$s">',         'after_widget' => '</aside>',         'before_title' => '<h3 class="widget-title">',         'after_title' => '</h3>',     ) );     }   add_action( 'widgets_init', 'rkk_widgets_init' );

現在在您的子主題中編輯您的 sidebar.php 檔案,並選擇僅在 bbPress 頁面上用 bbPress 側邊欄替換的側邊欄。

此示例使用的是直接來自話題 25 的程式碼。我們使用條件 is_bbPress 在 bbPress 頁面上顯示我們想要的側邊欄,並使用!is_bbpress 在 bbPress 頁面上不顯示我們想要替換的側邊欄。

<?php if ( is_active_sidebar( 'sidebar-1' ) && !is_bbpress() ) : ?>           <div id="widget-area" class="widget-area" role="complementary">         <?php dynamic_sidebar( 'sidebar-1' ); ?>         </div><!-- .widget-area -->   <?php elseif ( is_active_sidebar( 'bbp-sidebar' ) && is_bbpress() ) : ?>       <div id="secondary" class="widget-area" role="complementary">     <?php dynamic_sidebar( 'bbp-sidebar' ); ?>     </div><!-- .widget-area -->   <?php endif; ?>

現在轉到儀表盤> 外觀> 小工具,現在您將看到一個名為 「bbPress Sidebar」 的新側邊欄。

新增 bbPress 小工具後,它應該看起來像這樣。

論壇1

帶外掛

使用以下任何外掛都可以獲得特定於 bbPress 的側邊欄。如果您認為您發現的內容不夠好,我相信還有更多外掛可以執行此類功能。

限制小工具

小工具邏輯

bbPress WP 調整

27. 登入後自定義重定向

要更改使用者登入後重定向到的頁面,有像 Peter's Login Redirect 這樣的 WordPress 外掛可以處理重定向,或者您可以使用和自定義此 php 程式碼片段來實現相同的功能。

下面的 PHP 程式碼片段會將具有 Admin 使用者角色的使用者重定向到 WordPress 後端,並將其他任何人重定向到您網站的首頁。

/** * WordPress function for redirecting users on login based on user role */ function my_login_redirect( $url, $request, $user ){ if( $user && is_object( $user ) && is_a( $user, 'WP_User' ) ) { if( $user->has_cap( 'administrator' ) ) { $url = admin_url(); } else { $url = home_url(); } } return $url; } add_filter('login_redirect', 'my_login_redirect', 10, 3 );

Official Logos and Icons

Official Logos and Icons

Official Logos and Icons
Codex Home → Official Logos and Icons
Transparent PNG:
bbPress – Logo Large 1259px x 363px

bbPress – Logo 2x 416px x 130px

bbPress – Logo 208px x 65px

Dashicons Icons:

bbPress Logo: content: "f477"; – class="dashicons dashicons-bbpress-logo"
Forums/Hive: content: "f449"; – class="dashicons dashicons-bbpress-forum"
Topics/Honey: content: "f450"; – class="dashicons dashicons-bbpress-topic"
Replies/Bee: content: "f451"; – class="dashicons dashicons-bbpress-reply"
Note: The dashicons CSS classes will only work with WordPress 3.9 or newer.

Color:

bbPress Green #2d8e42

Step by step guide to setting up a bbPress forum – part 4

Step by step guide to setting up a bbPress forum – part 4

Step by step guide to setting up a bbPress forum – part 4
Codex Home → Step by step guide to setting up a bbPress forum – part 4
Using Actions
Actions and Filters add a powerful way that you can alter how bbPress (and of course WordPress) work.
For the newcomer to WordPress, they are also probably one of the hardest to find information on. This tutorial tries to demystify some of this area, and help newcomers code those changes that will make their site work how they wish.
This section deals with actions.
1. Actions
These are things you can get wordpress to do at a particular point in the code.  So if you want to add something to an area, then an action is probably what you want.  WordPress and bbPress are full of actions points throughout the code.
So lets look at what one looks like, so that you can recognise it

They start with do_action and then each one has a unique action name.
This example above occurs in the bbPress code before the author avatar on a topic or reply
So if you wanted bbPress to say the words 「Posted by」 before the author details are shown in a topic or reply, you』d create some code that would 「hook」 to this action, and that』s what the code will do.
2. Finding the code
So where is the code that we need to look at?
This is of course the first issue with bbPress (as with any other part of WordPress – finding out what file needs to be altered.
All the critical template files (the most likely you』ll want to alter) are held in the folder
Wp-content/plugins/bbpress/tempaltes/default/bbpress
Whilst many of the names give a good clue to what they do, you』ll probably need to delve into a few before you find the one you want.
I plan to make a list of these templates and what they do if/when I work it out!
For the meantime, just look through, and you should find.
3. Where to add actions
In this tutorial, we』ll look the code you need to create, but obviously that code needs to go somewhere.  So where do we put it?
We add actions either to the functions file, or create them as a plugin.
Both methods have uses.
If you like using plugins, then they』re a good way to add changes, and work well if you have a number of sites, as the plugin is easily uploaded to each.  But they do require a bit more knowledge to code.  But google the subject and you』ll find lots of help on creating one.  Then just put the code into it, and upload to your site. If you want others to use your clever code, then a plugin is a definite.
The alternate is to use a functions file.  As you are now at the 「advanced」 stage of using WordPress, you should either be developing your own themes, or using a Childtheme to store the specifics.
If you still just have a main theme from someone else (eg a wordpress default theme, a free theme or a premium theme), then you should create a childtheme.  This simply uses the main theme, and the you can add your tweaks to the childtheme.  Then if the maintheme is updated, you tweaks in the childtheme are not overwritten.  For help on creating a childtheme  google 「child theme wordpress video」 and you』ll find lots of demonstrations.
If someone has built a site for you, it may already be a in a child theme, and again the video』s will let you see whether this is the case.
Within our childtheme, we』ll put a functions.php file, and the actions we set up will go in there.
4. Example of code we can alter
So to start to understand what we need to do, lets have a look at one of bbPress』s templates and see where these are used.
The file we』ll look at is called 「loop-single-reply.php」 and the dafault is held at
wp-content/plugins/bbpress/templates/default/bbpress/loop-single-reply.php
Loop single reply is the template that  is used by bbpress to display a topic and the replies associated with it – eg this page

If we start to look at this file we』ll find at around line 39 the following

'
', 'show_role' => false ) ); ?>

This part of the code displays the author details.
Line 1 – So the first things we see is an action an action for 『bbp_theme_before_reply_author_details』
Line 2 – This is followed by the bbp_reply_author link code which displays the author avatar, name, and role.
Line 3 – tests if the viewer is keymaster
Line 4 – if the viewer is keymaster, you can add some admin things to do here.
Line 5 – if the viewer is keymaster,displays the IP address of the author
Line 6 – is another action we can hook to after it has displayed this
Line 7 – ends the 「if admin..」 statement
5. Adding a simple action
So as stated above, if we hook to 『bbp_theme_before_reply_author_details』, we can add text or data at this point
So lets add 「posted by」 to the start of the author display area.
To do this we』ll simply hook to this action.
In effect we create a bit of code with

a name
what we want to hook it to, and
what we want it to do

The name must be unique, as other plugins, themes or indeed you could have actions that should be carried out at this point.
So this is what I coded :
//this function hooks to BBpress loop-single-reply.php and adds "posted by" before the author details
function robin_w_posted_by ()
 {
echo 'Posted by' ;
 }
add_action ('bbp_theme_before_reply_author_details', 'robin_w_posted_by') ;

So let』s pick this apart
Line 1 – starting 『//』 is a comment line. You may know today what this function does, but in a few months time, you may not, so comments are good to remind you !
Line 2 – This sets up a function and calls it  『robin_w_posted_by』.  Functions within your website must be unique, so adding your name at the start will make it highly unlikely that any WordPress, bbPress or any plugins you have will already have this name.
Line 3 – The actual function code is then contained in the {  } so this opens the function code area.
Line 4 – the function code – in this case it is a simple 『echo』 command
Line 5 – closes the code area
So that creates the function, but now you must hook it to the do_action command in the bbPress code, that is tell WordPress where to implement it.
Line 6 – The final 『add_action』 command tells WordPress to add an action to 『bbp_theme_before_reply_author_details』 called 『robin_w_posted_by』 – the function we』ve just created.  And that』s it!
so

becomes

6. Adding an Action – further example
This example adds a post count to the author area, using the do_action( 『bbp_theme_after_reply_author_details』 ) action hook
//this function hooks to BBpress loop-single-reply.php and adds the post count to the reply display
function robin_w_display_count ()
{
$post_count = bbp_get_user_post_count( bbp_get_reply_author_id( $reply_id )) ;
echo "
Total posts : " ;
echo $post_count ;
echo "" ;
}
add_action ('bbp_theme_after_reply_author_details', 'robin_w_display_count') ;

Very similar to the first example, but here we set a variable called $post_count to the count and then use this to display the count.
The result: